Last weekend I had the wonderful opportunity to listen to Shelley Moore speak about inclusion in schools. I have linked her website on this post as a future resource:
Last weekend I had the wonderful opportunity to listen to Shelley Moore speak about inclusion in schools. I have linked her website on this post as a future resource:
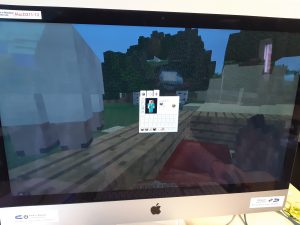
Today we had visitors from Colquitz Middle School to teach us how to play Minecraft and ways to use it in the classroom.
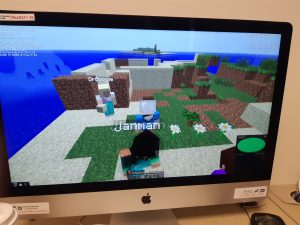
Here is what I learned about Minecraft:
You can build entire worlds in the game.
Colquitz has elementary and high school kids coming to the school to use the Minecraft server at the school
Minecraft operates on Microsoft server, school does not have Microsoft permission though so the students are unable to use the newer version (I think?)
Build sense of community using Minecraft. Groups must work together to finish tasks. In order to skip to the next day, all people must be asleep. Needs cooperation.
Learn agriculture, in order to survive you must grow food, need water, fences, livestock, tools to grow food. Solving real life problems in the game.
Has environmental systems built into it. If you harvest a tree correctly, it drops leaves that grow into saplings. The foliage will respawn naturally, creating new resources. The different ways you plant trees have different impacts. The newer versions may have more environmental considerations built in or the ability to take them into consideration.
Allows different sides of students to show, leadership skills can be developed through group tasks.
Way that Minecraft is being used directly in the classroom:
Social Studies
Developed civilizations in Minecraft. Class was divided up by leaders that were chosen by the students. Spawn to same spot, travel as a group to spot and build their civilizations within their space. Had to build it based off of a real civilization that they had learned about in Social Studies. Gave each other jobs and built over weeks of time.
Math
Teach x,y coordinate graph. Go into Minecraft and use 3 point graph to map and move around game. Also engaging core competencies as well as curricular competency.
Assessment:
Formative observations- listening and taking anecdotal notes while students are working
Stop and listen to what the students are saying
Ask deep core competencies questions in self-reflection form
I wanted to create a blog post where I left a link to Edutopia as a future resource for myself, so here it is!
Edutopia has been recommended as a great resource with research based ideas for teachers. Hopefully it is something that will help me down the road!
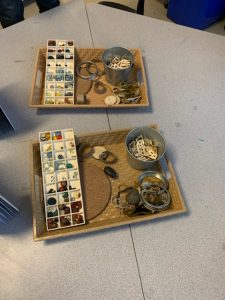
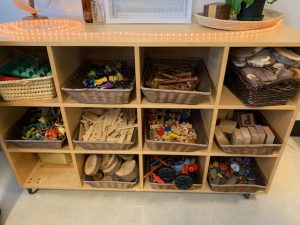
On Monday we had the opportunity to visit an inquiry based classroom at George Jay Elementary. Rebecca Bathurst-Hunt, co-author of Inquiry Mindset, was kind enough to host our tech class for an afternoon visit with her.
http://rebeccabathursthunt.com
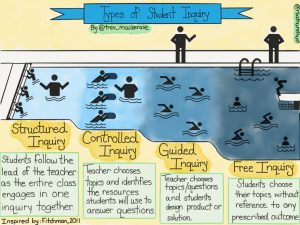
While there she spoke about the different stages of inquiry and gave us examples of how it could be used in different classrooms.
http://rebeccabathursthunt.com/sketchnotes/
She teaches kindergarten, which means that she rarely moves beyond controlled inquiry with her students. However, she has reached the less teacher guided inquiry once in the past years with her students. A key take away that I had was that just because you are an inquiry based classroom, that does not mean that you don’t have teacher guided questions and projects. It is important to start out with structured inquiry if your students have never experienced inquiry before. I also reflected that, just as students progress and process at different rates, some students may need teacher guided inquiery for a longer time, while others may be ready for a free inquiry at a faster rate.
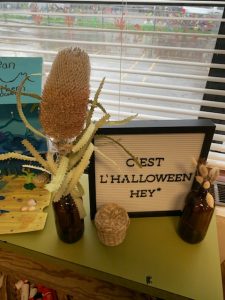
We were also given the chance to explore her classroom. I have put some pictures from the class below.
She also gave us the link to her slideshow, which is posted below as well.
I have provided a link to Michael’s blog, where he provided us with various additional resources from our class visit to PSII. There are lots of useful links that I know will be helpful in the future!
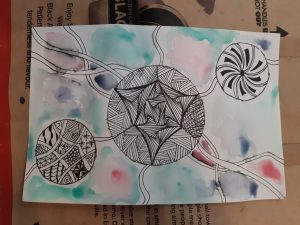
This weekend I had my second go at painting with watercolour paints. I had thicker paper this time and I a LOT lighter with my paints. The result was much better and the paint actually looks like watercolour paints. I decided to add some paint to the zentangles I had been doodling. I only have primary colours in my paint set so I created the pink, purple, and teal colour by combining different primary colours together. That was probably my favourite part of the entire process, creating the colours. I should have let my pen ink dry out longer, unfortunately when the water hit my lines, the pen ink bled out a little.
Here is the 3 colours that I created below:
The first thing I have to say after our visit to the Pacific School of Innovation and Inquiry (PSII), can I please go back in time and redo my high school education?
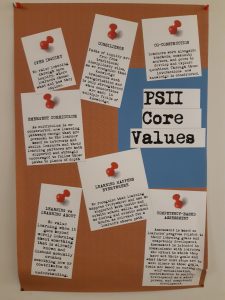
Jeff Hopkins, founder of the school, provided us with a great introduction of the school, were given time to ask many questions, and allowed to freely explore the building. He spent some time going over how they communicate and work with their students to ensure that all students get what they need from their school experience. He also gave a great rundown on how the students and staff use Trello to communicate and track learning. They lay out their card orders as follows:

I really like that they encourage students to write down all the questions that they have around their learning, even if they aren’t going to explore them right away.
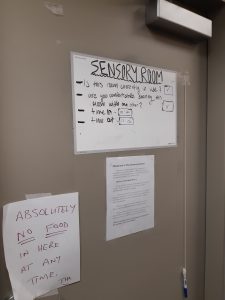
One room that I did not get to enter but interested me was the Sensory Room. The room was created by a student as an inquiry project, there is a sign in whiteboard, and people can choose if they are willing to share the sensory room or use it by themselves. There was also a quiet library work area, which means that they are allowing their students to choose the kind of environment they feel they would work best in.
I did not have the chance to speak to any students but it appeared that all the students I saw were working hard and collaborating together. I hope to have another opportunity to learn more about this forward thinking school.
Last Friday we had the opportunity to practice editing video and add sound into videos as well. I decided to try some editing of a video I took quite a few years ago while out for dinner in Santa Catalina, Panama with my family. I found the music on Free Music Archive- https://freemusicarchive.org/static
While the quality of the video is not the best it was still fun to play around with the few effects I know how to use! The next time I edit a video, I will try to make the transitions between the two breaks in the clip smoother.
So without further ado, here is the video:
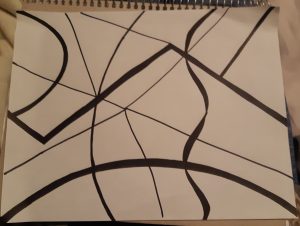
It has been a few weeks since I have gotten a chance to sit down and play around with my painting again. This time I wanted to try out my watercolour paints. I was a bit nervous since I have more experiences using acrylic paint over watercolour. I watched this YouTube video to get some tips before getting started. In hindsight I should have watched the entire video but I was a bit impatient so I decided to kind of wing it.
I realized before starting that I did not have any ‘watercolour’ paper, which meant that the effects of the paint weren’t quite what I had hoped for. Even so, it was still fun playing around with the colours and creating different textures on the paper.
I decided to tie in some concepts that we have been covering in our Teaching Art in the Elementary and Middle School Classrooms. This week we looked at using ‘lines’ in art so I decided to follow that theme with my painting at home. I started by using a sharpie to draw different lines on the paper. Once I had done that, I painted the various shapes that had been created by my lines intersecting.

Going forward I will try to be a bi more patient and watch some more tutorials in their entirety. I found another tutorial that seems quite useful as well. I know that my sketching skills will not be nowhere near this artist’s, however it will still be fun to try some pencil sketchings on the paper before putting paint on as well. Here it is posted below:
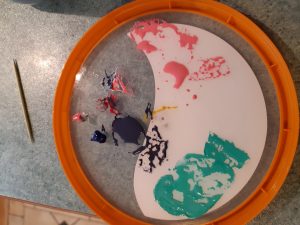
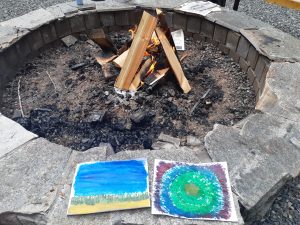
This week I began my first paint exploration session. I had put off using my paint supplies I purchased last week because I thought that the whole ‘set-up’ process would be a bit tedious. Turns out I was wrong! It took me all of about 2 minutes to set myself up next to the fire. I kept the expectations low, as I had only planned to play around with what the colours looked like on paper.
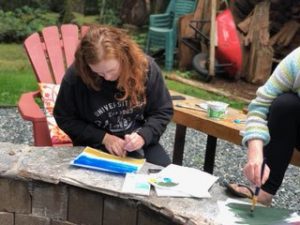
I decided to try out the acrylic paint set and will be saving my watercolours for another session. I happened to be away with my sister so she joined me in the painting as well, which made it less stressful because there’s fun in numbers. I painted for about 30 minutes and ended up with two pieces that I have posted below. I found that adding water to the paint once it was on the paper helped spread the paint out, which meant I used less paint to cover more space. I was worried about painting the rocks around the fireplace so I did not paint all the way to the edges of the paper.
© 2026 Laurel's Portfolio
Theme by Anders Noren — Up ↑
Recent Comments